Archives: Development

Pinions, set screws, and glue

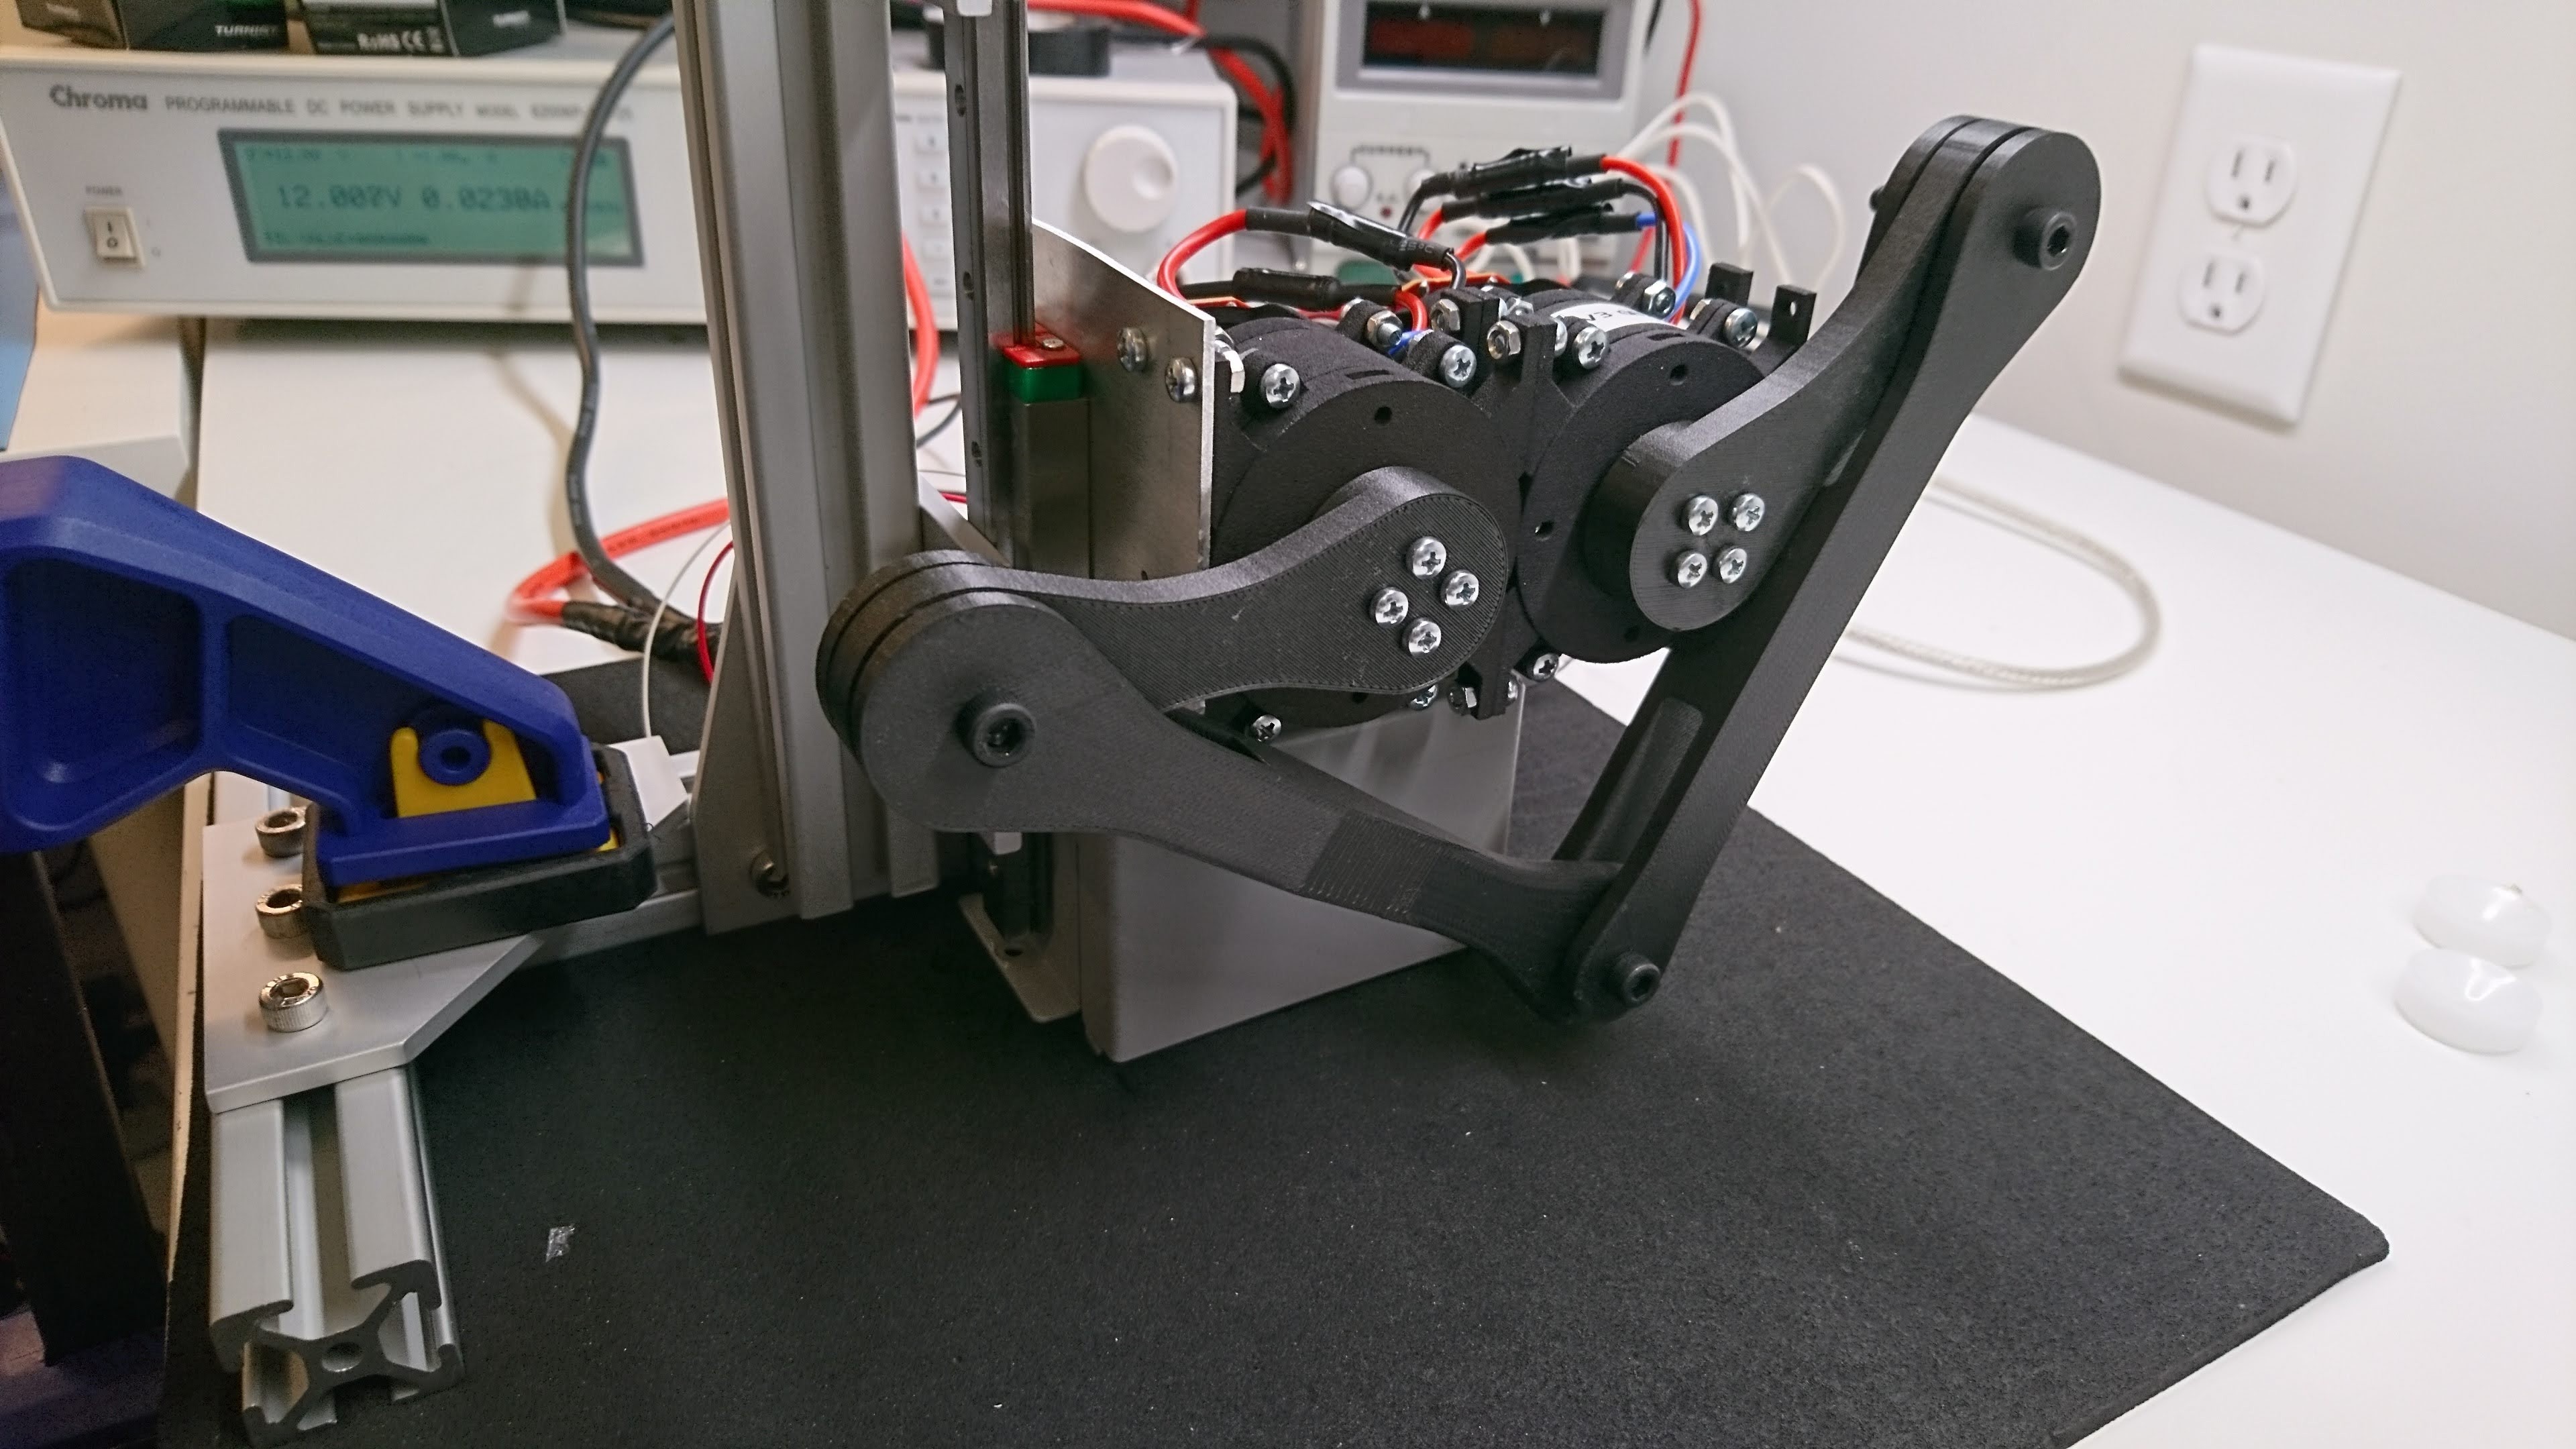
One of my intermediate goals for building new actuators for SMMB is to get them robust enough to jump continuously for some duration of time.  Progress is slow, as things break, new parts are ordered, repairs are made, and jumping resumes.  The most recent failure is at least interesting enough to me that it is worth writing up.

To recap, I’m building a brushless servo based around a Turnigy Elite 3508 brushless motor and a custom 5x planetary gearbox.  The 3508 is intended for quadcopter applications, so to install a spur gear I first extracted the original shaft, then pressed in a new shaft with two flats on it.  One flat for the set screw attaching the rotor to the shaft (which had a press fit), and a second for the set screw attaching the spur gear to the output of the shaft.

bazel for gstreamer - plan

After OpenCV, the other major dependency the mjmech software has, which is necessary to complete the raspberry pi 3b+ bazel build setup, was gstreamer. Unlike the previous dependencies, this one is a doozy – gstreamer has an enormous transitive dependency set. Additionally, we needed to use its ffmpeg wrappers, which brings in more dependencies.

In this post, I’ll just try to map out the dependencies that we ended up actually needing, so that they can be tackled one by one.

bazel for opencv

The next level of difficulty in bazel-ifying packages for mjmech was opencv.

First, for the impatient, Apache 2.0 licensed sources are available on github: https://github.com/mjbots/bazel_deps/tree/master/tools/workspace/opencv

OpenCV’s native build system consists of nearly 200 cmake files with over 20,000 total lines of code, plus assorted helper scripts and prototype files which are substituted into.  Fortunately, I didn’t need to support the full complexity of the opencv build system.  Things I didn’t bother to touch:

Slow motion leg jump

After the initial leg jumping with the prototype brushless actuator for SMMB, I spent some time actually tuning the control loops and making the firmware not incredibly convoluted to get started.  I also acquired a high speed camera for analysis.

So, here is a brief update of the final jump before I seem to have toasted one of my DRV8323 motor drivers.  It jumped for about 400ms of hang time, running at about half of the maximum current the system should be capable of pulling.

More robust jumping fixture

In my first foray into 80/20, I built a slightly more robust jumping fixture for the SMMB leg jumping test:

DSC_1246

Overall it is much more rigid than the old one, and looks a little nicer.  To top it off, I laid down a neoprene sheet for surface protection and friction enhancement, which is a step up from the old cardboard surface both in aesthetics and function.

HT-18 Thermal Imager Macro Mod

While working on the improved actuators for SMMB, I wanted to be able to perform some quantitative experiments to design the thermal transfer of the controller board and enclosure.  I figured that feeling with my fingers probably wasn’t scientific enough to make consistent progress.

Enter an inexpensive Chinese thermal imager, which you can find for under $300 from time to time.  A non-affiliate Amazon link: https://www.amazon.com/gp/product/B07BDJZ845

HT-18 Thermal Imaging Camera

It has a resolution 220x160, reads up to 300C and being intended for construction inspection has at least a little software support for reading out actual temperatures and capturing images for reports.  The only downside is the focal length.  It really can’t focus on anything less than about a meter away.  That isn’t too great for PCB inspection.

bazel-ifying simple autoconf packages

This is part N in a series describing how I created the bazel infrastructure to build all the third party packages for mjmech.  Previously we have:

We left off with the first, very simple packages configured to build with bazel.  In this installment we will tackle those that require at least minimal configuration, i.e. those that have some files which are normally generated as part of the build process.

First day jumping!

I continue to make progress on the improved actuators for SMMB.  To briefly recap, these are based on a home-built brushless servo consisting of off the shelf gears, bearings, 3d printed assemblies, and a custom control board.

Moving on from closed loop vector (FOC) control, I’ve now built up a second motor, set both of them communicating over the same RS485 bus, and wired up a minimal makeshift jumping fixture.  The leg didn’t jump as well as I had expected: I was only able to achieve about 300ms of air time and there are a lot of other minor problems/deficiencies as well.  But on the other hand, I don’t appear to have permanently broken anything yet, so improvement will hopefully be mostly continuous!

First closed loop vector control

I’ve reached a minor milestone in developing improved actuators for Super Mega Microbot.  Previously I demonstrated basic closed loop control using a VESC.  Now I have a custom control board running closed loop vector-based current and position control on a single brushless servo!  I’ll hopefully write up pieces in more depth later, but this post can serve as a proof of existence.

First, boards as received from MacroFab:

Mounted onto the planetary gearbox:

rules_mbed - bazel for mbed

When working on the firmware for Super Mega Microbot’s improved actuators, I decided to try using mbed-os from ARM for the STM32 libraries instead of the HAL libraries.  I always found that the HAL libraries had a terrible API, and yet they still required that any non-trivial usage of the hardware devolve into register twiddling to be effective.  mbed presents a pretty nice C++ API for the features they do support, which is only a little less capable than HAL, but still makes it trivial to drop down to register twiddling when necessary (and includes all of the HAL by reference).